
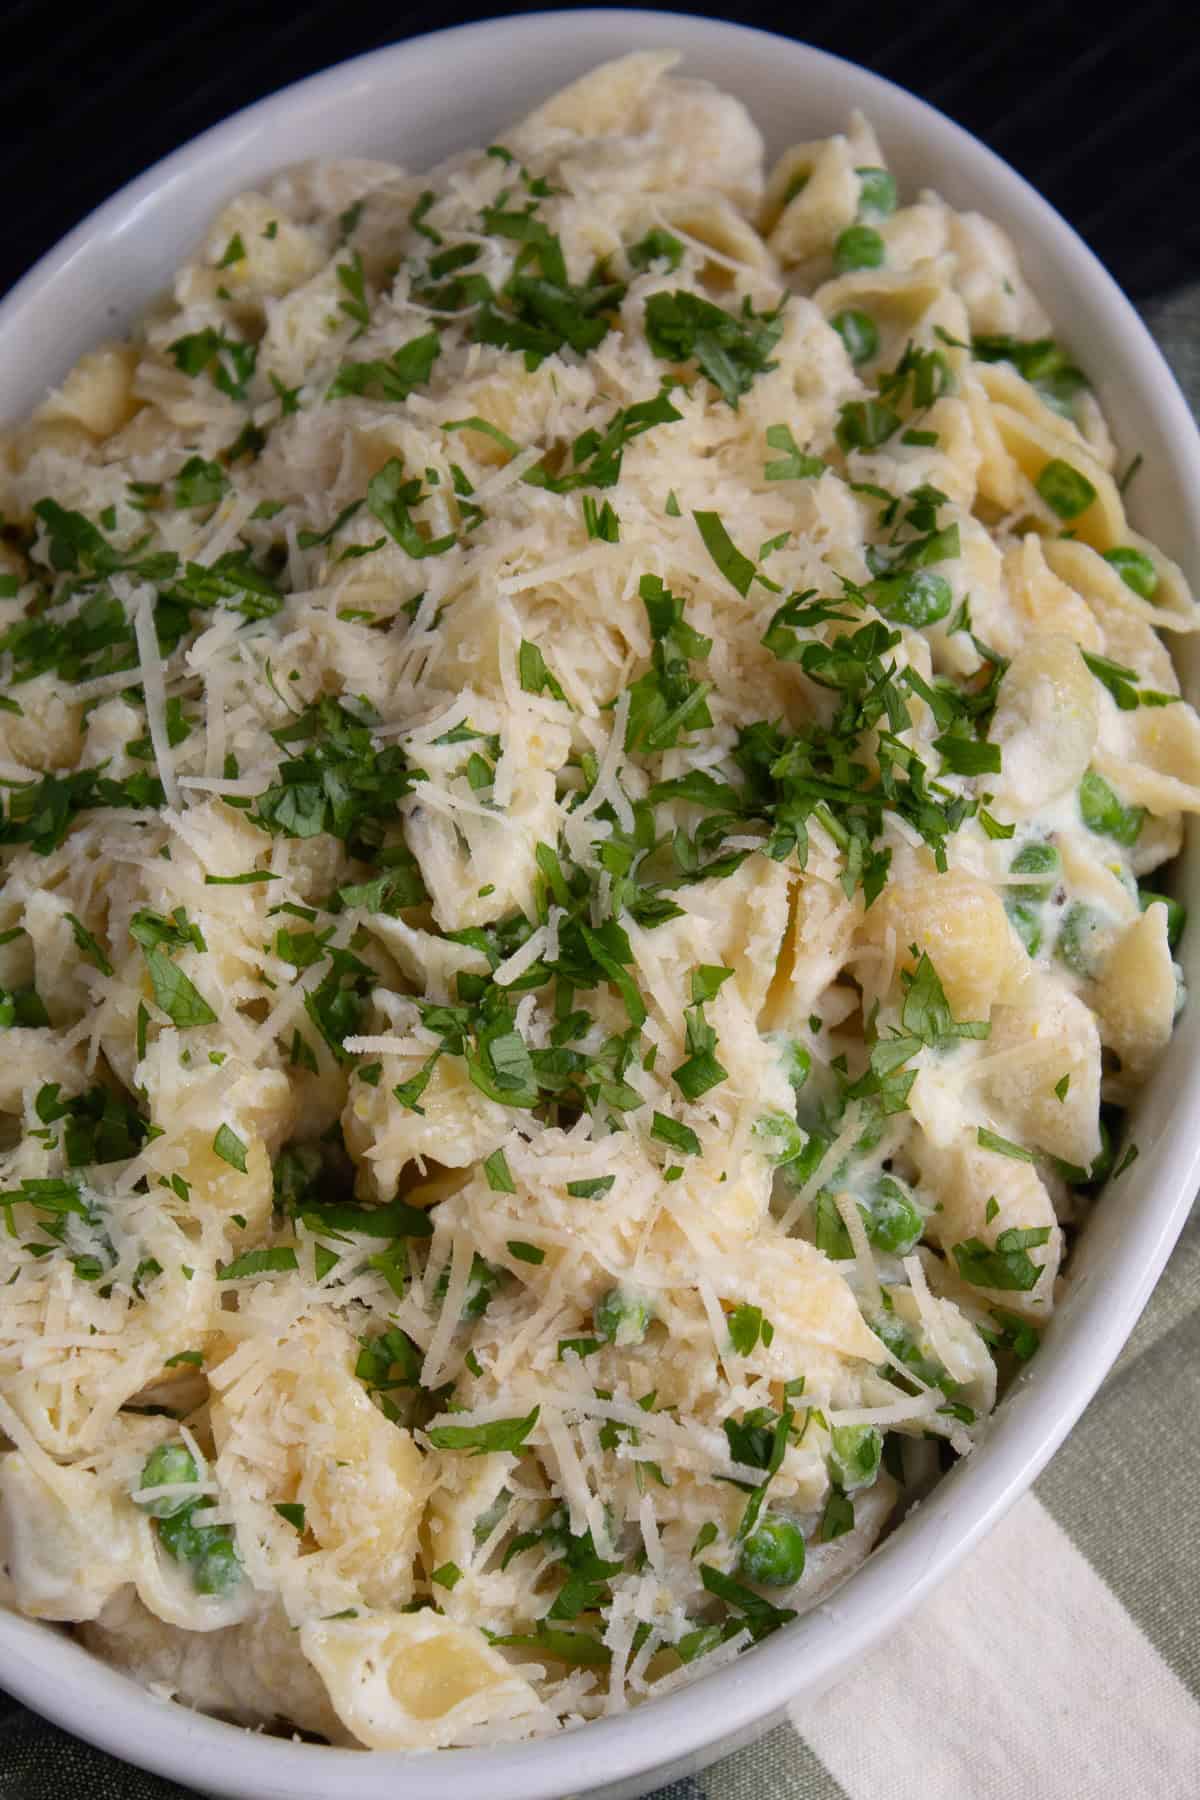
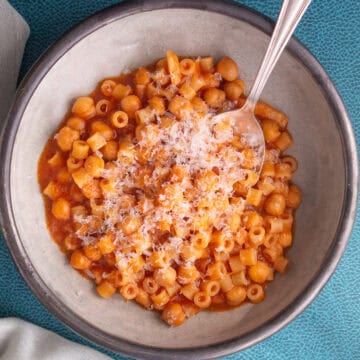
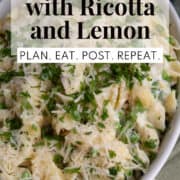
This simple one pot pasta with ricotta and lemon is in constant rotation on our meal plan. The creamy sauce is made with ricotta cheese and flavored with lemon juice and zest, garlic, Parmesan cheese, and black pepper. Shell pasta soaks up that rich sauce and is the best shape to grab the sweet green peas! The pasta is finished with a handful of bright parsley and extra Parmesan for a comforting main dish or side that compliments all sorts of dishes.
This recipe has been tested so that you can cook it on your stovetop or your pressure cooker. The pressure cooker version is quick and makes a tender pasta with a starchier sauce. The stovetop version gives you more control over the texture of the pasta as well as the sauce, since you add in reserved pasta water as you see fit when combining all of the ingredients at the end.
In spring, I love the combination of lemon, spring vegetables, and herbs and this Pasta with Ricotta and Lemon recipe has it all. It is a crazy simple dish to put together no matter which cooking method you choose. If you want to pair this dish with a lemony desert, try Lemon Curd Thumbprints, Strawberry Lemon Bars, or Sweet Focaccia with Blueberries and Lemon.
Jump to:
Ingredients
I include ingredient notes here when I think they'll be helpful, including ways to source, any preparation tips, or why I've chosen a particular ingredient. Be sure to check out the recipe card below for the full list of ingredients and their quantities!

- Shell Pasta - Use medium or mini shell pasta for this dish, both sizes are perfectly coated with sauce and scoop up the bright green peas.
- Garlic - Two fresh cloves are used in the recipe and they are blanched along with the cooking pasta so that the garlic flavor is mellow, not sharp.
- Ricotta Cheese - Ricotta is a fresh cheese with a slightly sweet and mild dairy flavor. Use a whole milk ricotta for the best flavor and texture in the finished pasta. The extra milk fat will help create a silky sauce.
- Parmesan Cheese - Freshly grated or shredded Parmesan adds a rich umami quality to the cheese sauce. Use a vegetarian Parmesan cheese if needed to keep the pasta dish vegetarian.
- Lemon - One fresh lemon will yield both lemon zest and lemon juice to bring a bright flavor note to the pasta. Do not substitute with bottled lemon juice, as this is one of the main flavor components of the dish.
- Frozen Peas - Frozen peas are so handy to have stashed in the freezer and they cook up in a flash. Because they are blanched before freezing to lock in the color and flavor, they need only a couple of minutes in the boiling pasta water to warm up and cook completely.
- Parsley - This common herb delivers a bright, verdant, grassy flavor to your pasta dish. Use flat-leaf parsley (also called Italian parsley) if you can find it. It's easier to clean and the flavor is a bit stronger. Give it a good rinse under running water before chopping. Parsley leaves can trap sandy soil.
Stovetop Instructions

Zest the lemon and then juice it to yield one teaspoon of zest and three tablespoons of juice. Chop the parsley and peel the garlic cloves.

Bring a large sauce pan of water to a boil over high heat.

Add the pasta to the cooking water and cook it according to package directions for an al dente texture.
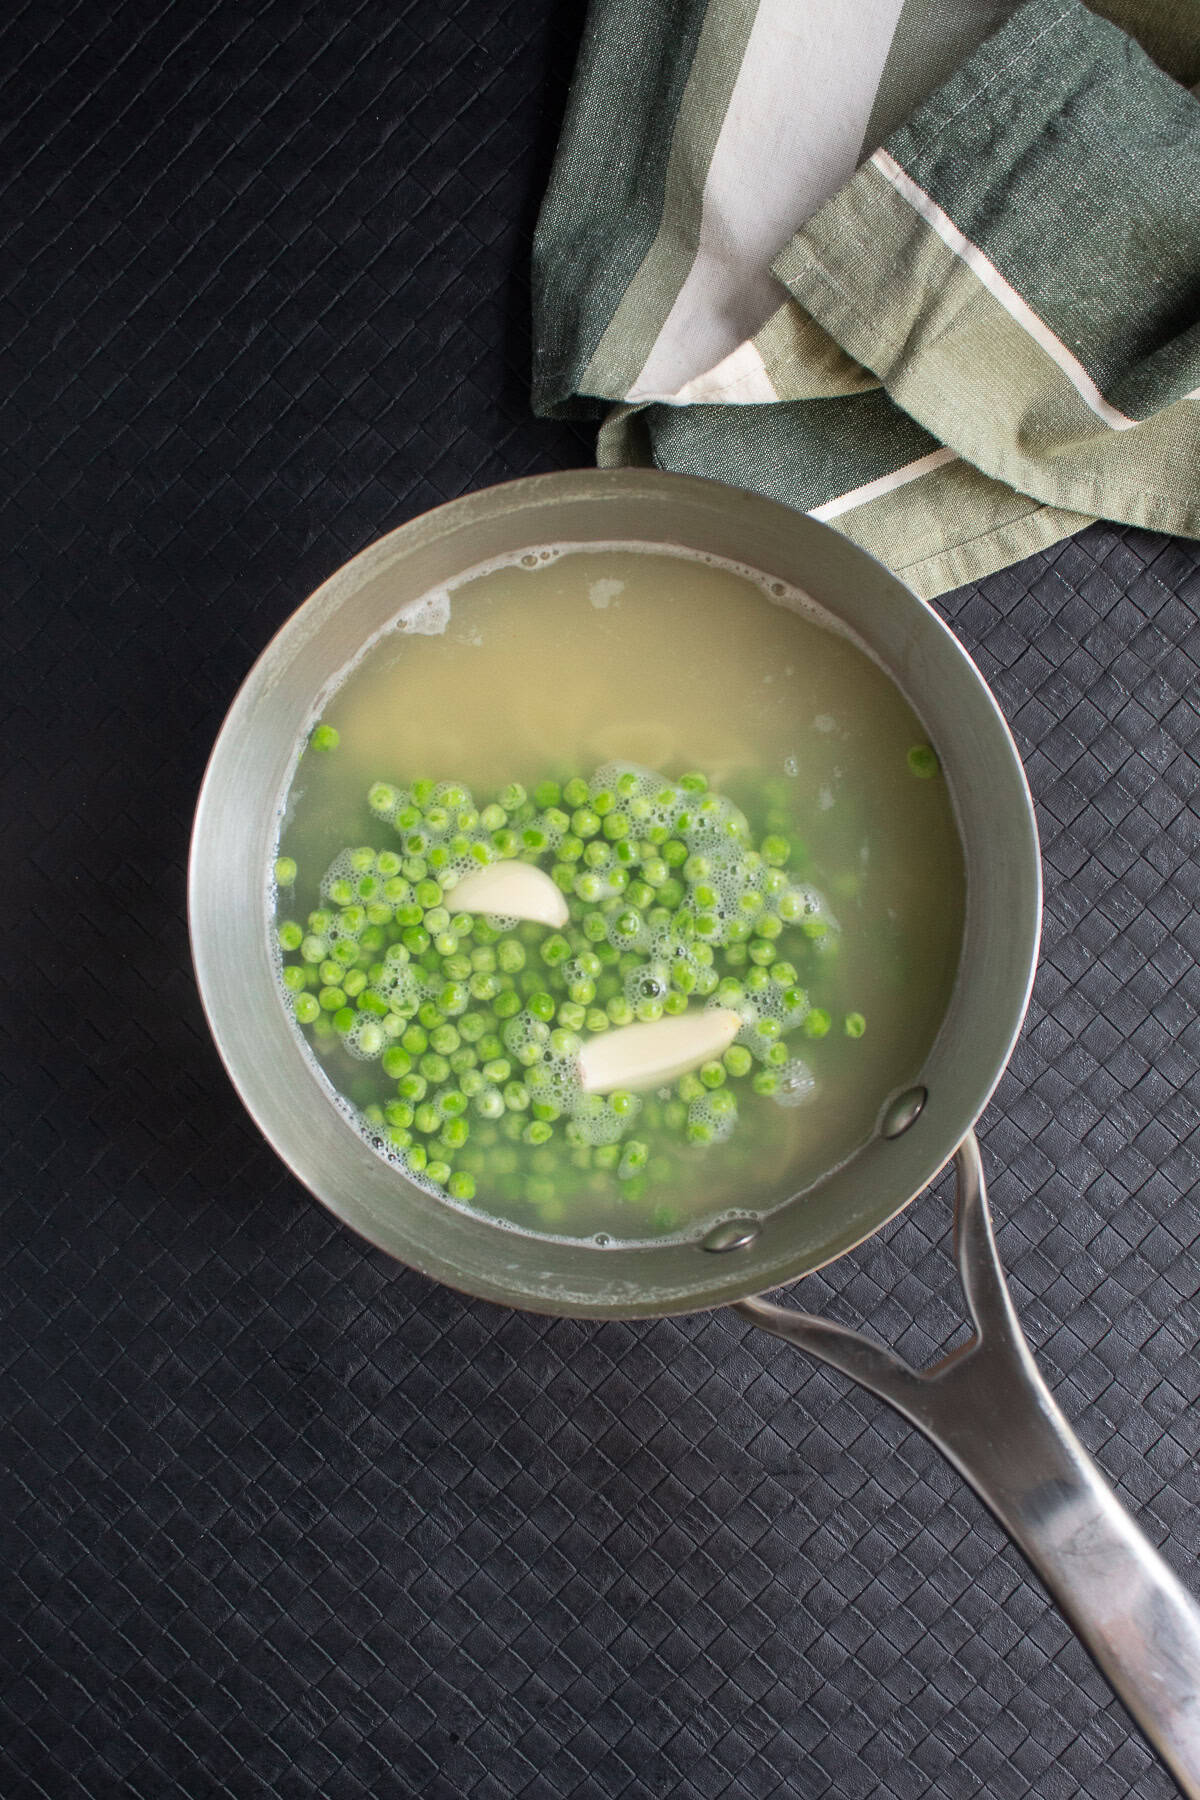
About two minutes from the end of the pasta cooking time, add your peas and garlic cloves. Continue cooking until the past is ready.
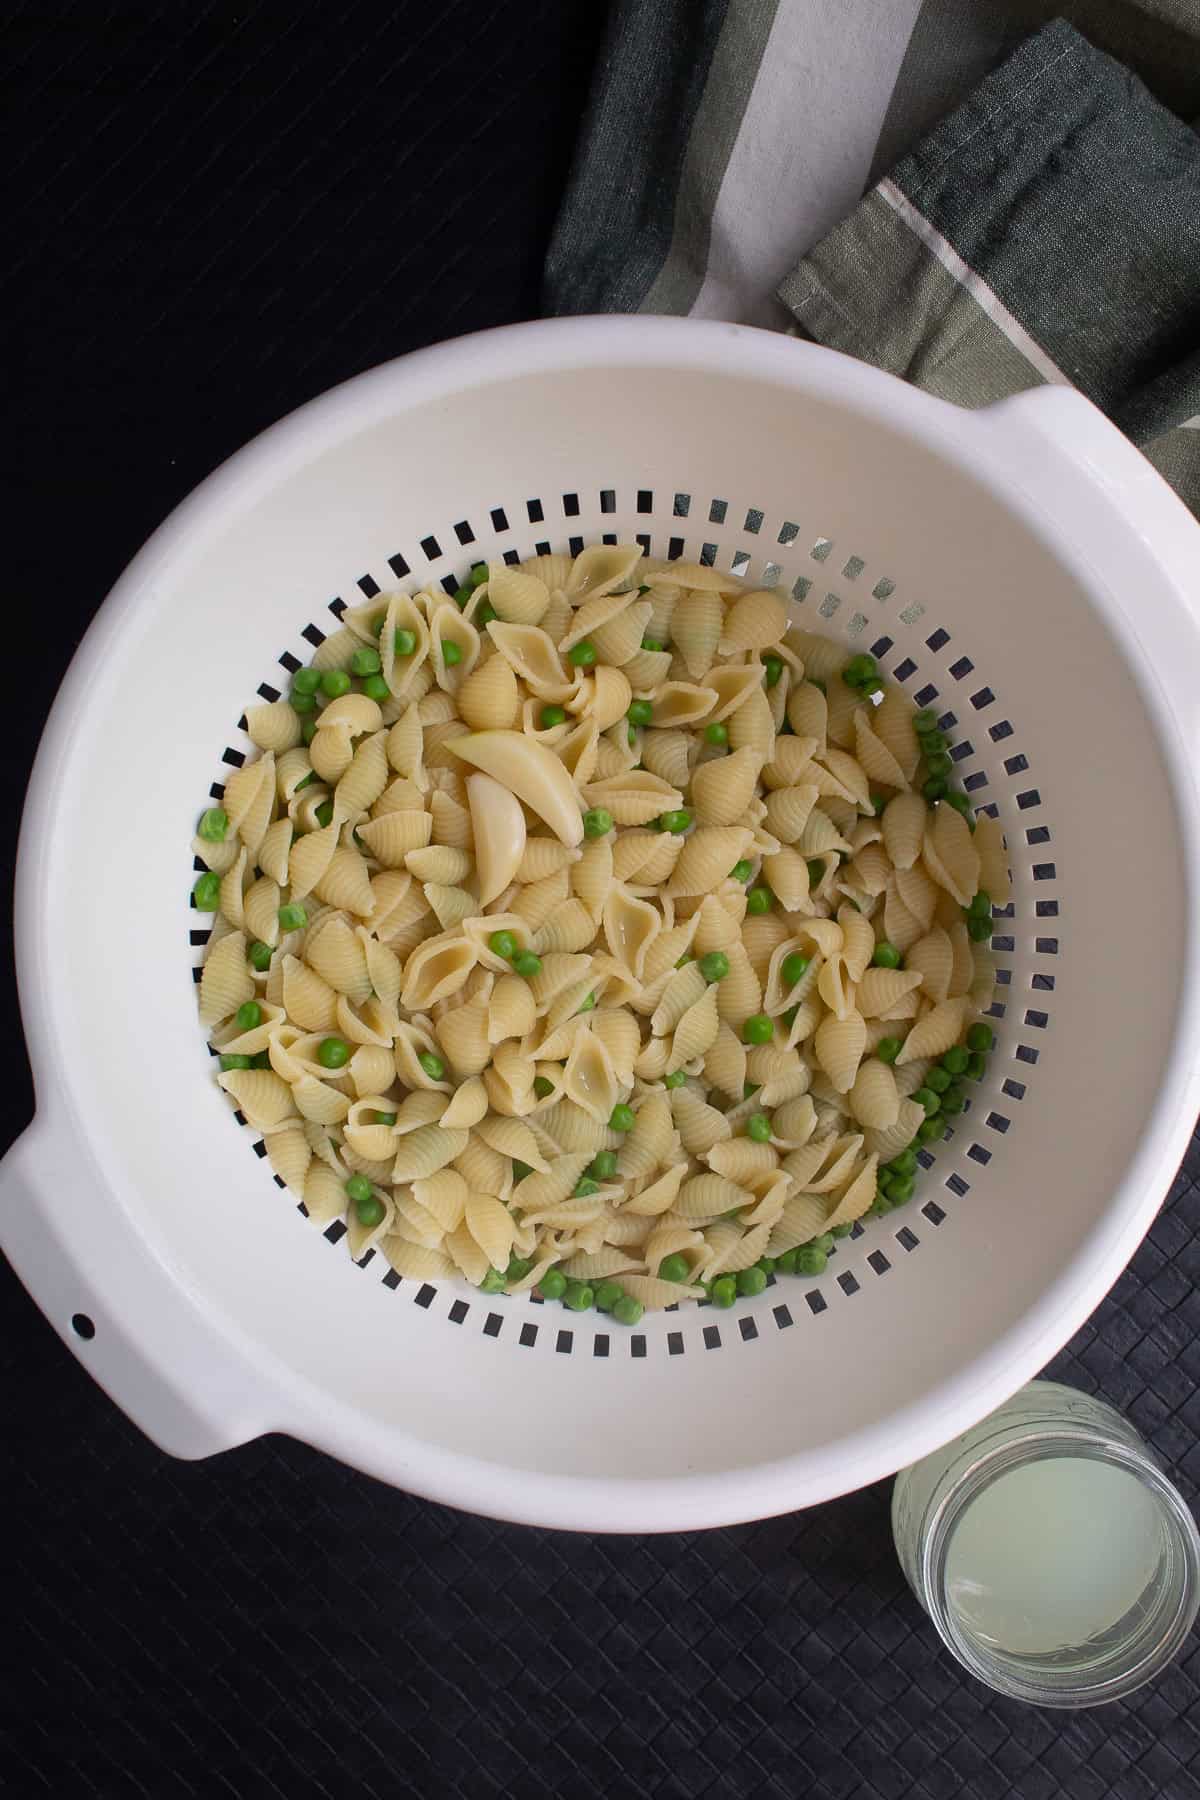
Before draining the pasta and peas, reserve about ½-cup of pasta water. This will be used for thinning the sauce as well as reheating any leftovers. Drain the pasta and peas completely.

Add the pasta and peas to the cooking pot with one tablespoon of olive oil. Stir the pasta and peas to coat them well and prevent them from sticking to the pot. Pull out the two blanched garlic cloves.
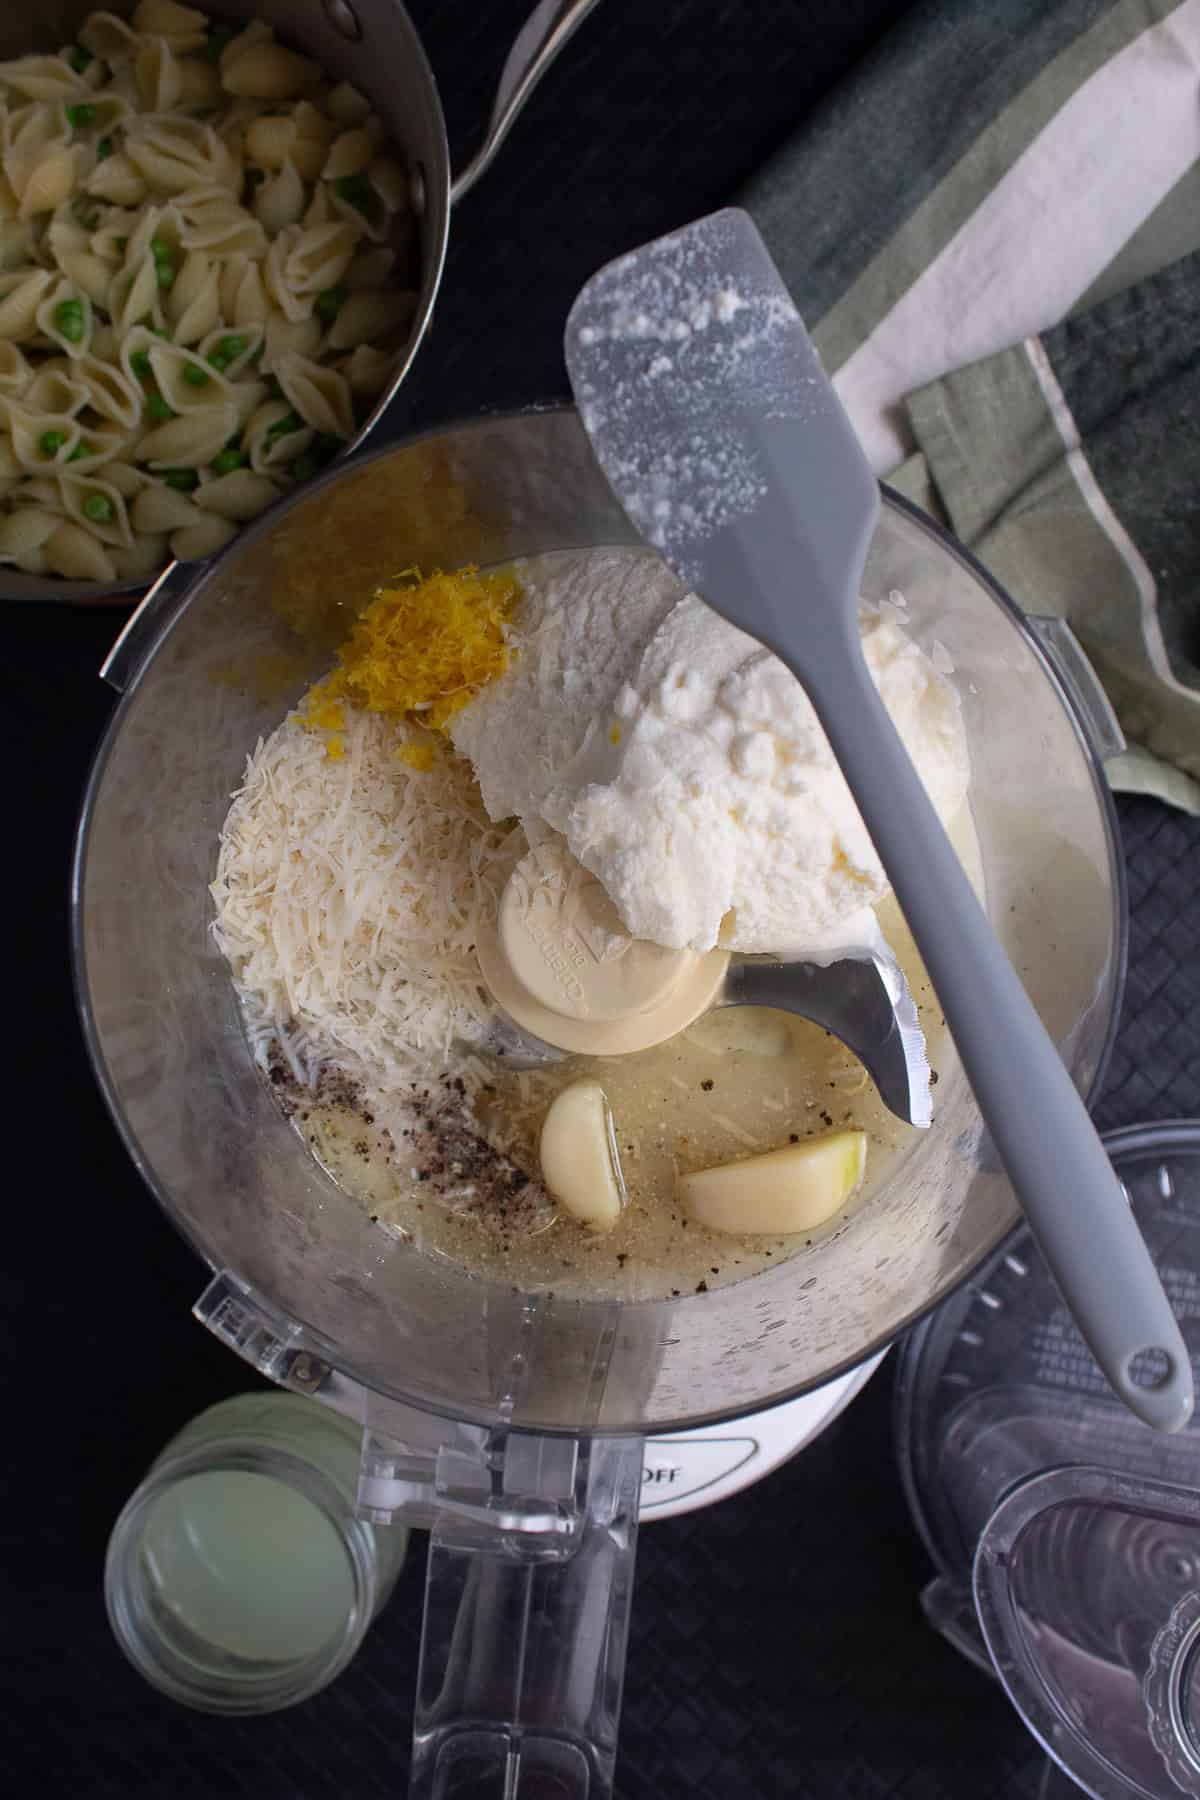
Add the ricotta, Parmesan cheese, lemon juice, lemon zest, salt, pepper, one tablespoon of olive oil, and the garlic cloves to the bowl of a food processor.

Process until the sauce is smooth, stopping once or twice to scrape down the sides of the processor.

Add the blended ricotta and lemon sauce to the warm pasta and peas.

Stir the pasta to evenly coat it with the sauce. Use a splash of reserved pasta water, if desired, to get the desired texture for the sauce.

Transfer the pasta to a serving dish and garnish it with the chopped parsley. Sprinkle over some extra Parmesan or offer it table side for topping individual portions.
Pressure Cooker Instructions
You can prepare this pasta in the pressure cooker for an even speedier meal. Add the pasta, 1 tablespoon of oil, garlic, and 2 cups of water to the pressure cooker insert. Seal and cook with manual high pressure for 6 minutes and perform a quick release.
While the pasta cooks, thaw the peas under cool water. Prepare the sauce as indicated above and in the recipe card below. Stir the sauce and peas into the hot pasta and allow the pasta to sit for a few minutes to warm the sauce and peas. Garnish with the parsley and extra Parmesan cheese and serve!
Substitutions and Variations
The substitutions listed below have been tested in this recipe and work well. If you successfully make any other ingredient substitutions, let us know in the comments!
- Use Fresh Peas - If you have fresh peas on hand, they'll need a bit longer cooking time than frozen peas. Add them to the boiling water (for the stovetop method) about halfway through the recommended pasta cooking time. This will give the peas 4-5 minutes to cook thoroughly.
- Change Pasta Shapes - We love the pasta shells because each one perfectly holds a pea! If you don't have pasta shells on hand, switch up the pasta shape to fusilli, cavatappi, orecchiette, gemelli, or rotini pasta. Just follow package directions for pasta cooking time.
- Make Additions - Keep this pasta vegetarian but add extra flavor with wilted spinach, sauteed mushrooms, torn basil leaves, broccoli, or some extra spice with crushed red pepper flakes. Add a boost of protein with cooked and crumbled bacon, sauteed shrimp, grilled chicken, or cooked and crumbled sausage.
Equipment
Use the common kitchen tools below to make the preparation of this tasty pasta easy and quick:
- Food Processor - The ricotta sauce gets extra smooth when you use a food processor to blend the cheeses, garlic, and lemon. Alternatively, you can use a standard blender with a pitcher large enough to accommodate the sauce ingredients.
- Microplane Zester - Use this for grating the Parmesan as well as zesting the lemon. These long wand-style graters make quick work of any citrus, Parmesan cheese, nutmeg, or chocolate for all sorts of recipes. The small holes of a box grater will also work for both the Parmesan and the lemon, just take care to only grate the yellow part of the lemon skin.
- Citrus Reamer - I find pressed glass reamers with a dish to catch the juice and a spout for easy pouring at the thrift store all the time.
Serving Suggestions
Serve this pasta with a hefty sprinkle of additional Parmesan cheese and the chopped parsley right on top. This is a cozy dinner all on its own or with a green salad, but can also be a side dish for grilled or baked chicken, sauteed shrimp, or broiled salmon.
Make This Recipe Kid Friendly
This pasta sauce is creamy and mild and many kids enjoy it. I have one that doesn't like the lemon in the sauce, so I process all of the other ingredients separately and reserve a small portion of the ricotta sauce for them. Then I add the lemon juice and zest back into the sauce, stir it together, and use this version for the rest of the family. This is a small step that makes this recipe something everyone at our table can enjoy.
Find more tips like this in my post Keeping Peace with Picky Eaters!
Storage
You can store any leftovers in an airtight container for up to 3 days. I find that the sauce gets absorbed into the pasta when it rests; stir in an extra dollop of ricotta or a splash of milk or reserved pasta water when reheating to restore the creamy texture. Pasta with Ricotta and Lemon reheats well for weekday leftovers.
FAQ
Yes, this pasta dish reheats well. To get the best texture in the sauce when reheating, add a splash of milk or reserved pasta water and stir it in to rehydrate the pasta.
With the peas and parsley, this one pot pasta is colorful and filling enough to eat as a meal or main dish all on its own. Both the peas and the ricotta provide protein to pair up with the hearty pasta shells.
You can absolutely add all of the sauce ingredients right to the hot pasta and peas without blending into a smooth sauce beforehand. The cooked garlic cloves should be mashed or grated to blend into the pasta, but everything else can be stirred in as is. This makes a less uniform sauce, but works in a pinch if you don't have a blender or food processor.
More Vegetarian Pasta Dinners
Dig in to any of the recipes below for a hearty vegetarian meal or side dish with big flavor and easy preparation:


Savory Lemon Dishes
Lemon is one of my favorite flavors to add for perking up both sweet and savory recipes. Check out these recipes for new options for adding lemon to your main and side dishes:


Try It and Share
I hope you try this One Pot Pasta with Ricotta and Lemon and enjoy the recipe as much as we do. I want to see your results! Tag your photo with #planeatpostrepeat and mention me @planeatpostrepeat on Instagram or Facebook. I can give you a virtual high five and thank you for cooking one of my recipes! Comment below with any questions and please leave a review so others can find this recipe more easily.
This post was originally titled Lemon Ricotta Shells. The post was updated in February of 2026 to change the title, add extensive preparation details and step-by-step photos, and add additional post structure for easy navigation. The recipe was also slightly updated from the original April 2021 version for improved quality.
Recipe
One Pot Pasta with Ricotta and Lemon
Equipment
- Pressure Cooker
- food processor
Ingredients
- 8 oz. small shell pasta
- 2 tbsp olive oil (divided)
- 2 cloves garlic
- 8 oz. whole milk ricotta cheese
- ¼ cup grated Parmesan cheese (0.5 ounces, plus extra for serving)
- 1 lemon
- ¾ teaspoon kosher salt
- ¼ teaspoon ground pepper
- 1 cup peas (frozen)
- ¼ cup fresh parsley (chopped)
Instructions
- Zest and then juice the lemon to yield 1 teaspoon of lemon zest and 3 tablespoons of juice.
- Chop the parsley and peel the garlic cloves.
Stovetop Instructions
- Bring a large pot of water to boil over high heat. Boil pasta according to package directions, adding the garlic cloves and frozen peas for the last two minutes of cooking.
- Reserve ½ cup of the starchy pasta water and then drain the pasta. Transfer the pasta and peas back to the cooking pot and add 1 tablespoon of olive oil to keep the pasta from sticking. Pull out the two garlic cloves for the next step.
- In a food processor, combine ricotta, Parmesan, lemon juice and zest, salt, pepper, 1 tablespoon olive oil, and the garlic cloves from the cooked pasta. Process until very smooth.
- Add the blended sauce to the pasta and peas in the cooking pot. Stir to coat the pasta with the sauce. If needed, use the reserved pasta water to get the sauce to the desired texture.
- Serve garnished with the parsley and additional Parmesan cheese as desired.
Pressure Cooker Instructions
- Add the pasta, 1 tablespoon of olive oil, garlic, and 2 cups water to the pressure cooker.
- Cook with manual high pressure for 6 minutes, then quick release the pressure.
- Rinse the peas under cool water in a strainer to partially thaw them and then set them aside.
- In a food processor, combine ricotta, Parmesan, lemon juice and zest, salt, pepper, 1 tablespoon olive oil, and the garlic cloves from the pressure cooker. Process until very smooth.
- Add the peas and blended sauce to the pasta in the pressure cooker. Stir to coat the pasta with the sauce. Cover the pasta and allow it to sit for a few minutes to warm the sauce.
- Stir the pasta again and serve garnished with the parsley and additional Parmesan cheese as desired.
Nutrition facts are sometimes provided below and are calculated using an online calculator. With specific brands of ingredients and additions, omissions, or substitutions the nutrition facts may change. We encourage you to use your own nutrition facts calculator to obtain the most accurate nutrition facts for your meal.
Cassie says
I’d love to hear what your family thinks of this easy past dish!